Setting up a PC to work
This guide is for those of us who care about the safety of ourselves and our partners. If you do everything described below, you will greatly reduce the chances of being caught.
First, we need to install free and secure Linux as a host. I used to think it was totally safe to turn on a VPN on Windows. Unfortunately, this is not the case at all, the problem is not only IP, not even the browser fingerprint. The problem with the OS and applications is that it is impossible to trust proprietary code, its only task is to make money from you. I advise you to forget about Windows and MacOS. For example, the well-known fact that Windows syncs your PC with akamai on the first boot, as far as I know, newer versions don’t start a PC without an account and Internet access. Is this your device?
Any OS with Live mode will do, but I will use Kicksecure in this guide. Why Kicksecure? It is an open source system, many useful features and nothing superfluous, everything is stable and efficient. In virtual machines, you can safely install whatever you need by diving deep into Linux, you will understand that there is everything and more, more convenient, safer, free. The main functions of a secure host OS:
- Ram-wipe
- Live mode (all data is stored in RAM)
- minimum software
Kicksecure installation.
Always try to install the latest stable version. Here you will find the official guide with up-to-date information - https://www.kicksecure.com/wiki/ISO
Open the BIOS and select the flash drive first in the launch queue.
Select LIVE Mode | SYSMAINT Session | system maintenance, install

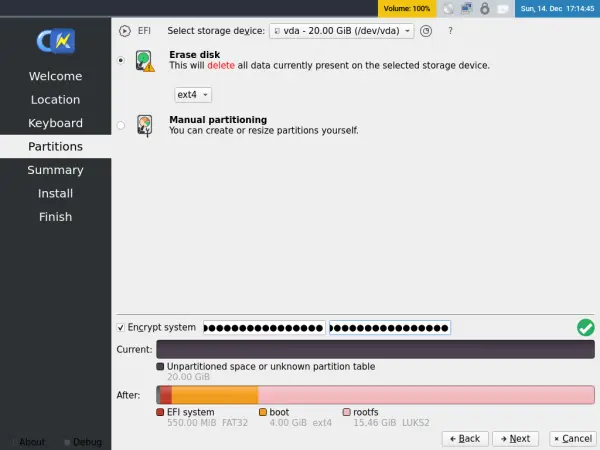
Install the system:

Completely delete data from the selected drive and encrypt the device. Here you can select the encryption method - https://www.kicksecure.com/wiki/Full_Disk_Encryption#TPM_Encryption_Comparison_Table
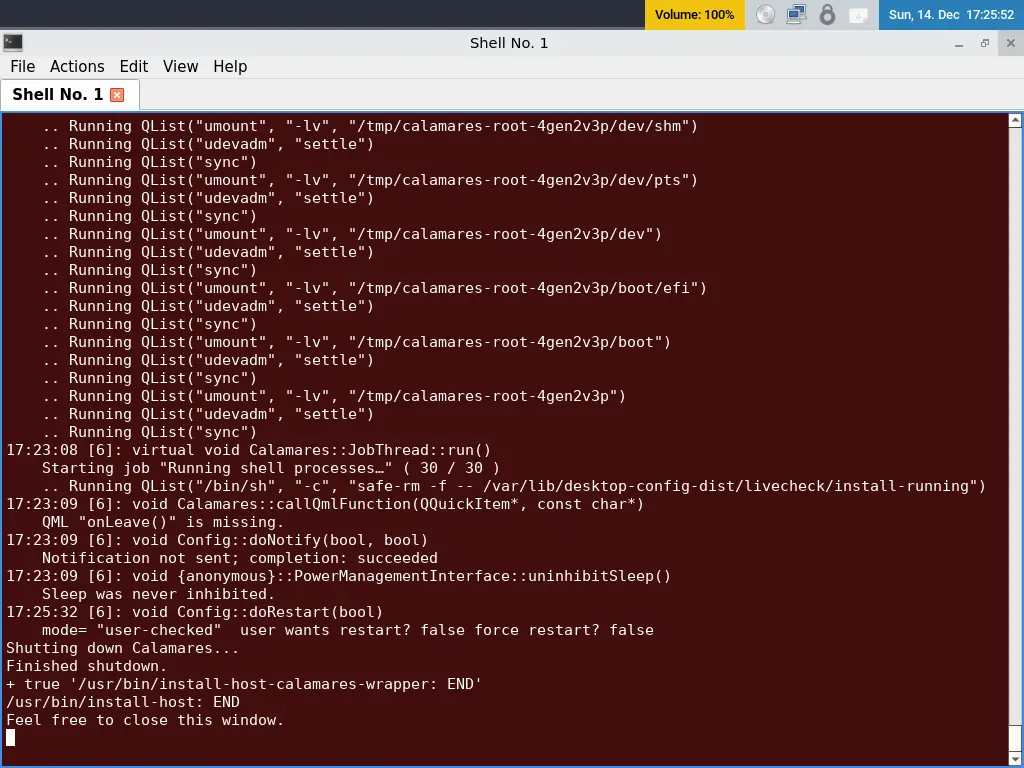
Installation complete, turn off PC
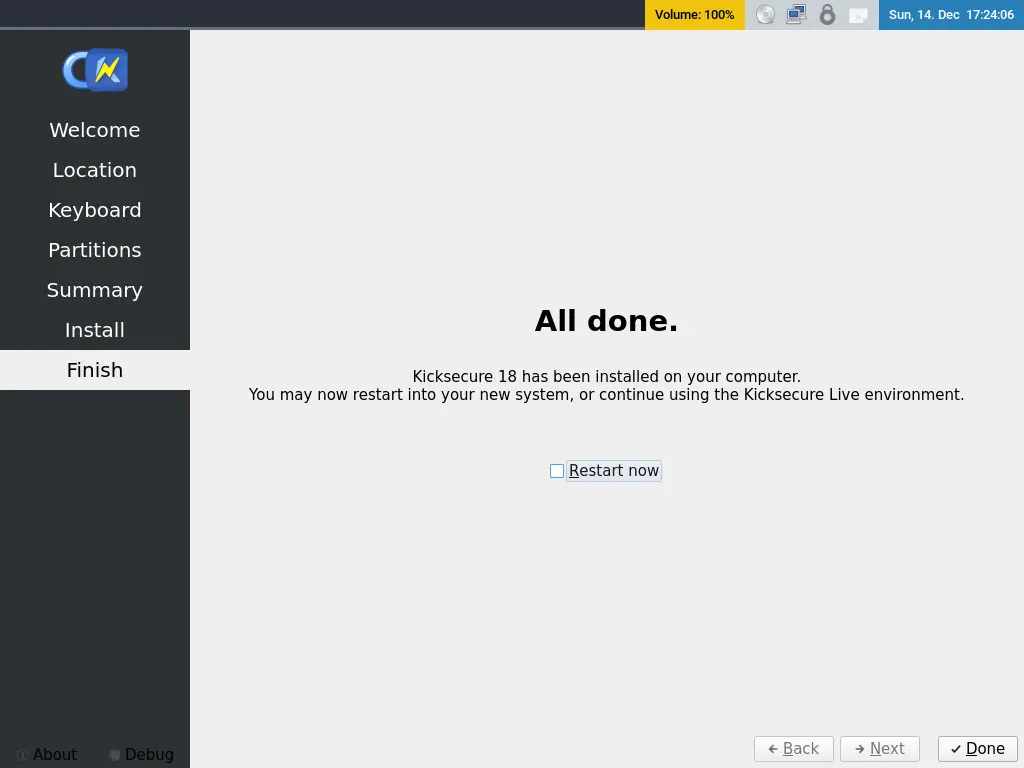
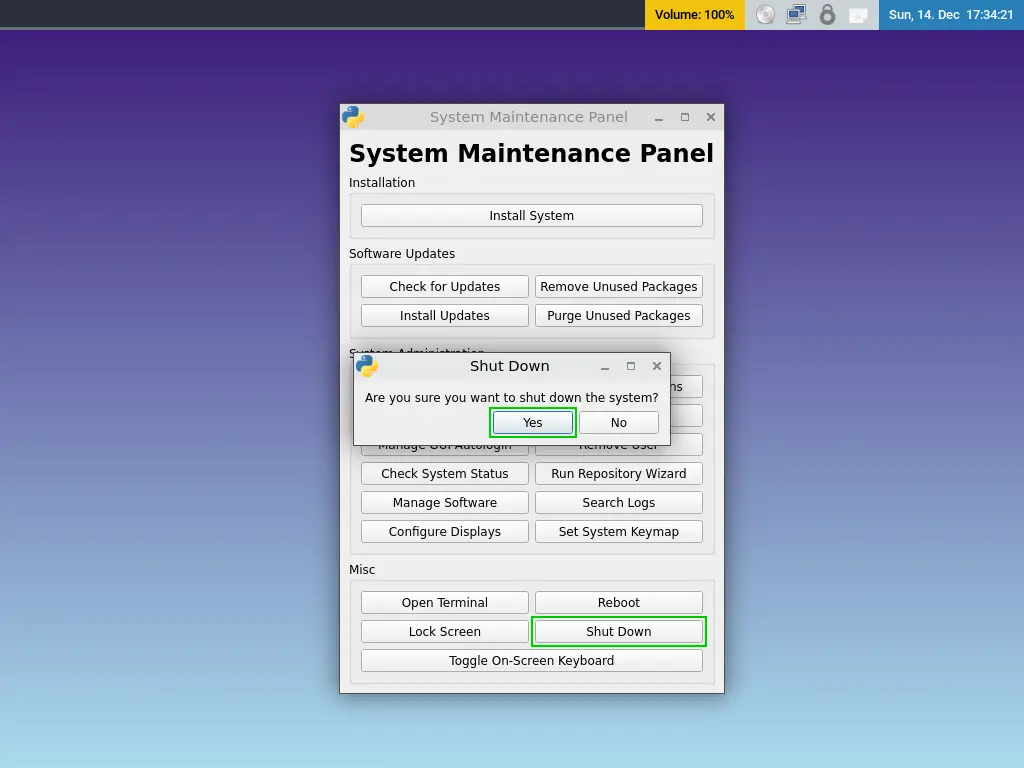
- Disconnect the flash drive from the computer.
- Go to 'PERSISTENT Mode | SYSMAINT Session... *
- Update the packages.
- Test LIVE mode (after restarting new data from the disk will be deleted). Do not upload anything to the host system! It is intended only for virtual machines and disk decryption, as well as, optionally, for an open source VPN (Mullvad, V2Ray).
QEMU/KVM installation with virt-manager (FOSS)
This is the de facto standard for virtualization in Linux. The most convenient to use, stable and high-performance option.

Install programs for virtualization:
sudo apt install libvirt0 virt-manager dnsmasq bridge-utils

sudo systemctl enable -now libvirtd
sudo systemctl disable -now dnsmaq

sudo usermod -a -G libvirt user
sudo usermod -a -G kvm user
Next, we will use nano to quickly configure through the terminal. To save, just press Ctrl+O, and to close the file - Ctrl+X.
sudo nano /etc/libvirt/libvirt/conf
unix sock group = "libvirt"
unix sock rw perms = "0770"
sudo nano /etc/libvirt/qemu.conf
group = "libvirt"
user = "user"
Apply the changes:
systemctl restart libvirtd.serviceCreate folders for virtual machines and images. Give libvirt permission to access these folders.
mkdir ISOs
mkdir VMs.

sudo chmod 770 -R VMs
sudo chmod 770 -R ISOs

sudo chown user:libvirt -R VMs
sudo chown user:libvirt -R ISOs
Now all we have to do is create virtual machines; I'll tell you how to do that later.
Setting up emergency reboot
In an emergency, there will be little time to think. We will make it as easy as possible to erase the traces and encrypt the device at the touch of a button.
nano reboot.sh
#!/bin/bash

systemctl reboot -i
Setting the hot key in labwc:
mkdir ~/.config/labwc
nano ~/.config/labwc/rc.xml
Contents of rc.xml file:
<?xml version="1.0"?>
<labwc_config>
    <keyboard>
        <default />
        <keybind key="Control_R" onRelease="no" allowWhenLocked="yes"><action name="Execute" command="/home/user/reboot.sh" /> </keybind>
    </keyboard>
</labwc_config>
Restart labwc to apply settings
labwc -rPress the right Ctrl to check.
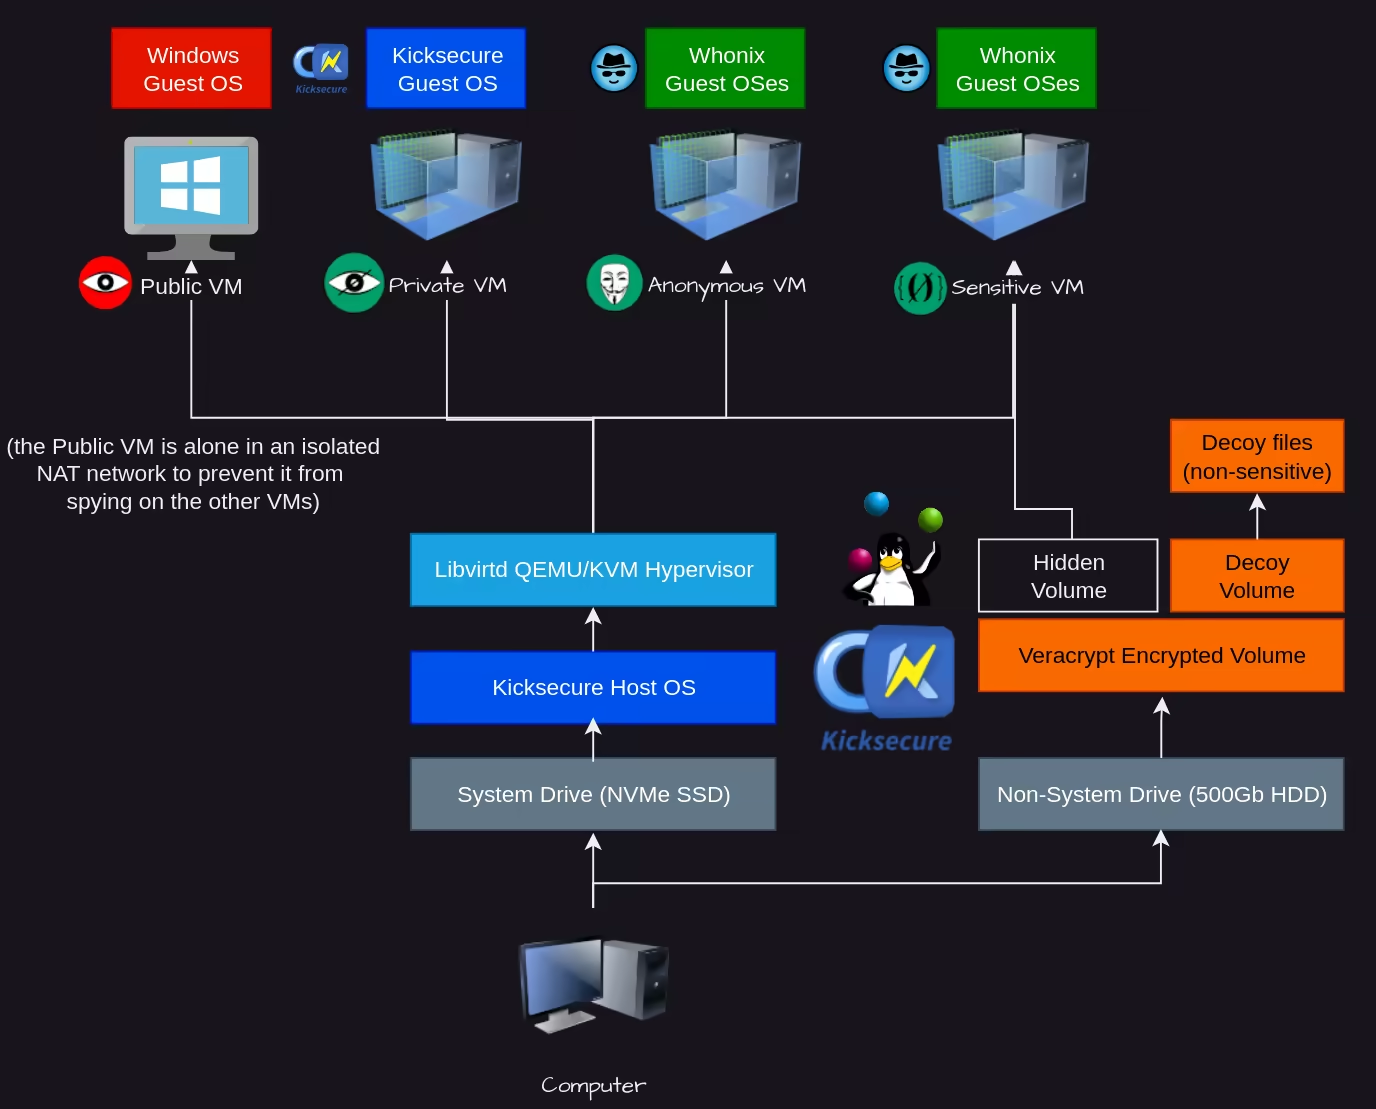
Setting up a sensitive system
It'll be a system for work. Take all measures so that its existence can be plausibly denied. To do this, you will need a high-quality hard drive of at least 500 GB. It is the hard drive that is required as other drives are unstable and can be used to detect a hidden volume. Therefore, only HDD CMR with a rotational speed of 7200 rpm are quite reliable and fast.
Download the source code of VeraCrypt or zuluCrypt. Install the libraries required for compilation https://veracrypt.jp/en/CompilingGuidelineLinux.html https://github.com/mhogomchungu/zuluCrypt/blob/master/BUILD_INSTRUCTIONS
Prepare everything you need to build, read the instructions and look the source code. You can build an app, but don't run an encryption app so nothing gets logged.
All subsequent actions must be performed exclusively in Live!!!
Format an external drive with GParted so there are no partitions left on it.
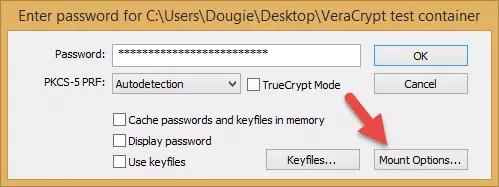
Run the encryption app. Start creating volumes.
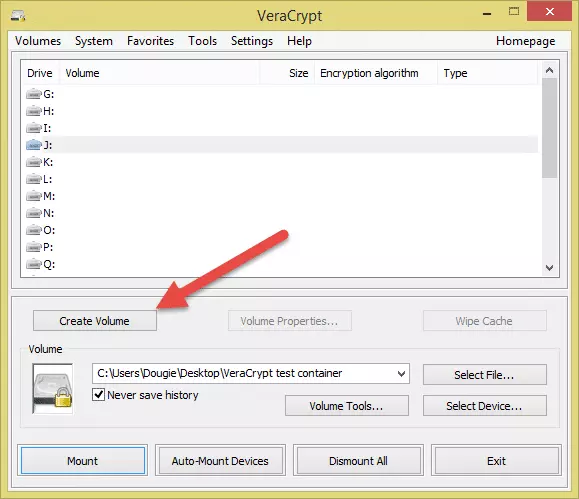

 Next:
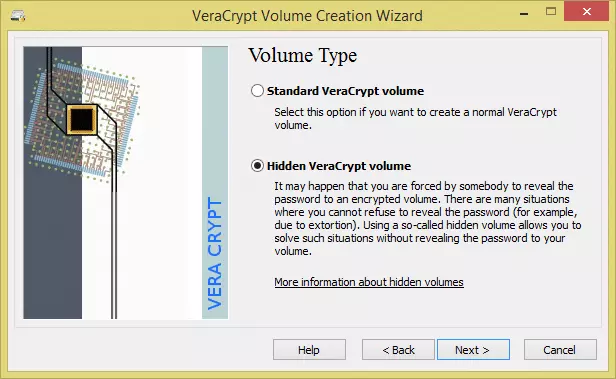
Next:
- Outer (decoy) - FAT format
- Select /dev/sdX (not the one on which the OS is running, but the external one)
- Enter the password for a false volume and encrypt it.
- Select the size of the hidden volume (half the disk)
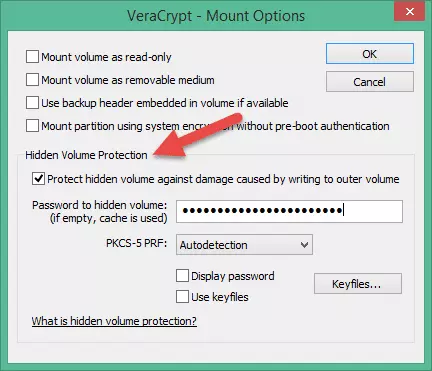
- Enter the password for the hidden volume (ext4 format) and everything is ready.
Protect hidden volume against damage caused by writing to outer volume
 Download suitable files (less than 4GB) that are worth encrypting
Do not write down the password to the hidden one anywhere.
At the end of the process, open the hidden volume. Download the Whonix archive for KVM - https://www.whonix.org/wiki/KVM#Download_Whonix
Open the folder in the terminal where the archive was uploaded Check the contents.
ls -lCheck the path along which the disk is mounted; it will be indicated in the following steps - <mount_path>
pwdUnpacking of archives:
tar -xvf Whonix*.libvirt.xz Confirm Whonix's agreement:
touch WHONIX_BINARY_LICENSE_AGREEMENT_acceptedFor convenience, it is recommended to rename the files:
mv Whonix-Gateway-Xfce-17.2.8.5.xml             Whonix-Gateway.xml
mv Whonix-Workstation-Xfce-17.2.8.5.xml         Whonix-Workstation.xml
mv Whonix_external_network-17.2.8.5.xml         Whonix_external_network.xml
mv Whonix_internal_network-17.2.8.5.xml         Whonix_internal_network.xml
mv Whonix-Gateway-Xfce-17.2.8.5.Intel_AMD64.qcow2       Whonix-Gateway.qcow2
mv Whonix-Workstation-Xfce-17.2.8.5.Intel_AMD64.qcow2   Whonix-Workstation.qcow2
Check the path to the virtual machine file and make sure Whonix-Gateway has 1GB of RAM allocated.
nano Whonix-Gateway.xml
cat Whonix-Gateway.xml

[...]

  <memory dumpCore="off" unit="GiB">1 </memory> <currentMemory unit="GiB">1 </currentMemory>

[...] <disk type="file" device="disk"> <driver name="qemu" type="qcow2"/> <source file="<mount_path>/Whonix-Gateway.qcow2"/> <target dev="vda" bus="virtio"/> <address type="pci" domain="0x0000" bus="0x00" slot="0x06" function="0x0"/> </disk>

[...]
Add resources to Whonix-Workstation as described here: https://www.whonix.org/wiki/KVM#Adding_vCPUs
We will also check the path to the file. 8 GB of RAM and 4 virtual processors should be enough.
nano Whonix-Workstation.xml
cat Whonix-Workstation.xml

[...]

  <memory dumpCore="off" unit="GiB">8 </memory> <currentMemory unit="GiB">8 </currentMemory>

[...] <vcpu placement="static">4 </vcpu>

[...] <disk type="file" device="disk"> <driver name="qemu" type="qcow2"/> <source file="<mount_path>/Whonix-Gateway.qcow2"/> <target dev="vda" bus="virtio"/> <address type="pci" domain="0x0000" bus="0x00" slot="0x06" function="0x0"/> </disk>

[...]
Let’s create a script.sh file to easily start and stop virtual machines.
#!/bin/bash

if [ $(virsh -c qemu:///system list --all | grep Whonix | wc -l) -ne 0 ];
then

    virsh -c qemu:///system destroy Whonix-Gateway
    virsh -c qemu:///system destroy Whonix-Workstation
    virsh -c qemu:///system undefine Whonix-Gateway
    virsh -c qemu:///system undefine Whonix-Workstation
    virsh -c qemu:///system net-destroy Whonix-External
    virsh -c qemu:///system net-destroy Whonix-Internal
    virsh -c qemu:///system net-undefine Whonix-External
    virsh -c qemu:///system net-undefine Whonix-Internal
else

    virsh -c qemu:///system define <mount_path>/Whonix-Gateway.xml
    virsh -c qemu:///system define <mount_path>/Whonix-Workstation.xml
    virsh -c qemu:///system net-define <mount_path>/Whonix_external_network.xml
    virsh -c qemu:///system net-define <mount_path>/Whonix_internal_network.xml
    virsh -c qemu:///system net-autostart Whonix-External
    virsh -c qemu:///system net-start Whonix-External
    virsh -c qemu:///system net-autostart Whonix-Internal
    virsh -c qemu:///system net-start Whonix-Internal
    exit $?
fi
Run the script bash script.sh to see if everything works. Later, to turn everything off, just run the script again.
Network Whonix-External defined from <mount_path>/Whonix_external_network.xml

Network Whonix-Internal defined from <mount_path>/Whonix_internal_network.xml

Network Whonix-External marked as autostarted

Network Whonix-External started

Network Whonix-Internal marked as autostarted

Network Whonix-Internal started

Domain 'Whonix-Gateway' defined from <mount_path>/Whonix-Gateway.xml

Domain 'Whonix-Workstation' defined from <mount_path>/Whonix-Workstation.xml
As you can see, we have successfully configured virtual machines. Let's run a graphical interface to manage them.
virt-managerAt launch, select PERSISTENT Mode | SYSMAINT Session... Update all packages. Restart the system; for convenience, you can delete the user-sysmaint section by selecting the REMOVE user-sysmaint-split command.
Emergency situation
 Someone knocks on the door, and before it breaks down, you have 5 seconds to press one button. If you practice, you will definitely succeed. To make it easier, you should also think about where to put your computer in the workplace.
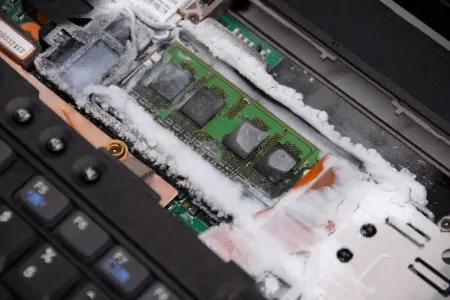
- Forensic experts check your RAM and hard drive - RAM is empty and drives are encrypted
- You are asked to enter a password to the disk, but it is not necessary to do it immediately.
- You're waiting for a judge to decide on a password request. You enter a password, but neither the operating system nor the decoy volume reveals anything significant.
The scenario largely depends on the country in which you are located, but such a setup is necessary for any specialist in our field - it reduces the attack area and gives you more time to think. Don’t neglect safety; being careless is stupid. To feel a little more confident in the future, do your best for yourself and those around you today.
Installation of applications
I cannot help but mention the software that should be used in a virtual machine designed to work with sensitive data. All applications must be open source to avoid leaks. Don’t worry - the Linux ecosystem is well-established and highly developed; here you will find everything you need.
I recommend downloading:
- KeepassXC - conveniently stores your passwords in a compressed and encrypted format
- OpenSnitch - makes it easy to track and filter requests sent by your apps
- SimpleX is a modern, fully open source messenger that can provide you with privacy, anonymity and plausible denial.
- Monero is the only true cryptocurrency. She is the hardest to track, has low fees and offers pretty fast transfers.
Backup copies
You may have configured the system so that after a certain action on your part (for example, physical damage to the USB drive for authentication), the data on your PC and external drives is no longer recoverable. In this case, you will need backups to subsequently regain access to your accounts and funds.
To do this, we need to create an encrypted file in VeraCrypt of no more than 10 MB in size. The size of the hidden volume should be 5 MB. It is necessary to fill it with important data (wallet keys, password database file) as follows:
- Open a hidden volume of VeraCrypt in a container, such as
diaryto save important data. - After saving, close the hidden volume.
- Open a false volume and write something into it (otherwise you cannot prove the absence of a hidden volume, since the time of the last change will be later than that of other files).
- Close the false volume (ONLY NOW you can start backing up the container).
- Back up the encrypted container on USB drives and hide them in places where they can be safely stored and easily found. Power users can also back up data on a small anonymous server, taking extreme care and fully understanding what they are doing.
Thanks for finishing it. Stay tuned - new articles will be coming soon.